Setting up filters
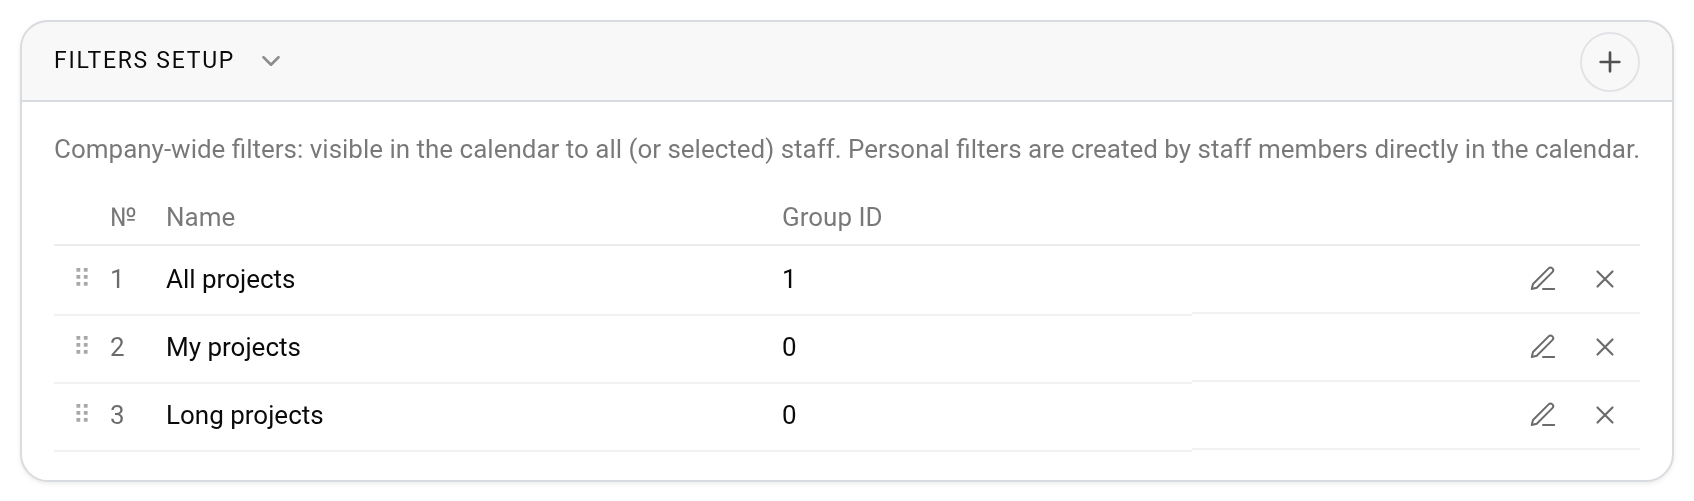
Common company filters are set up in the global settings: gear "Settings" → "System" → "Calendar", the "Filters setup" card. Such filters are visible in the calendar to all employees or only to selected ones. Personal filters are created by employees themselves, right in the calendar, see Filters and search.
Document and finance statuses are not filter conditions. To view projects by these statuses, use the "Documents" and "Finance" tabs above the calendar: they color projects by the selected status. More: Document and finance statuses.
List of filters
The "Filters setup" card has a row for each common filter: "№", "Name" and "Group ID". The icons at the end of the row edit and delete the filter. The system asks you to confirm before deleting. The order of filters is changed by dragging a row by the ⠿ icon on the left.
Under the table you may see how many filters have been created and how many your service plan allows, for example "Filters by service plan: 3 / 10". When the limit is reached, the "+" button becomes inactive.
Personal filters of employees are not shown in this list.
How to create a filter
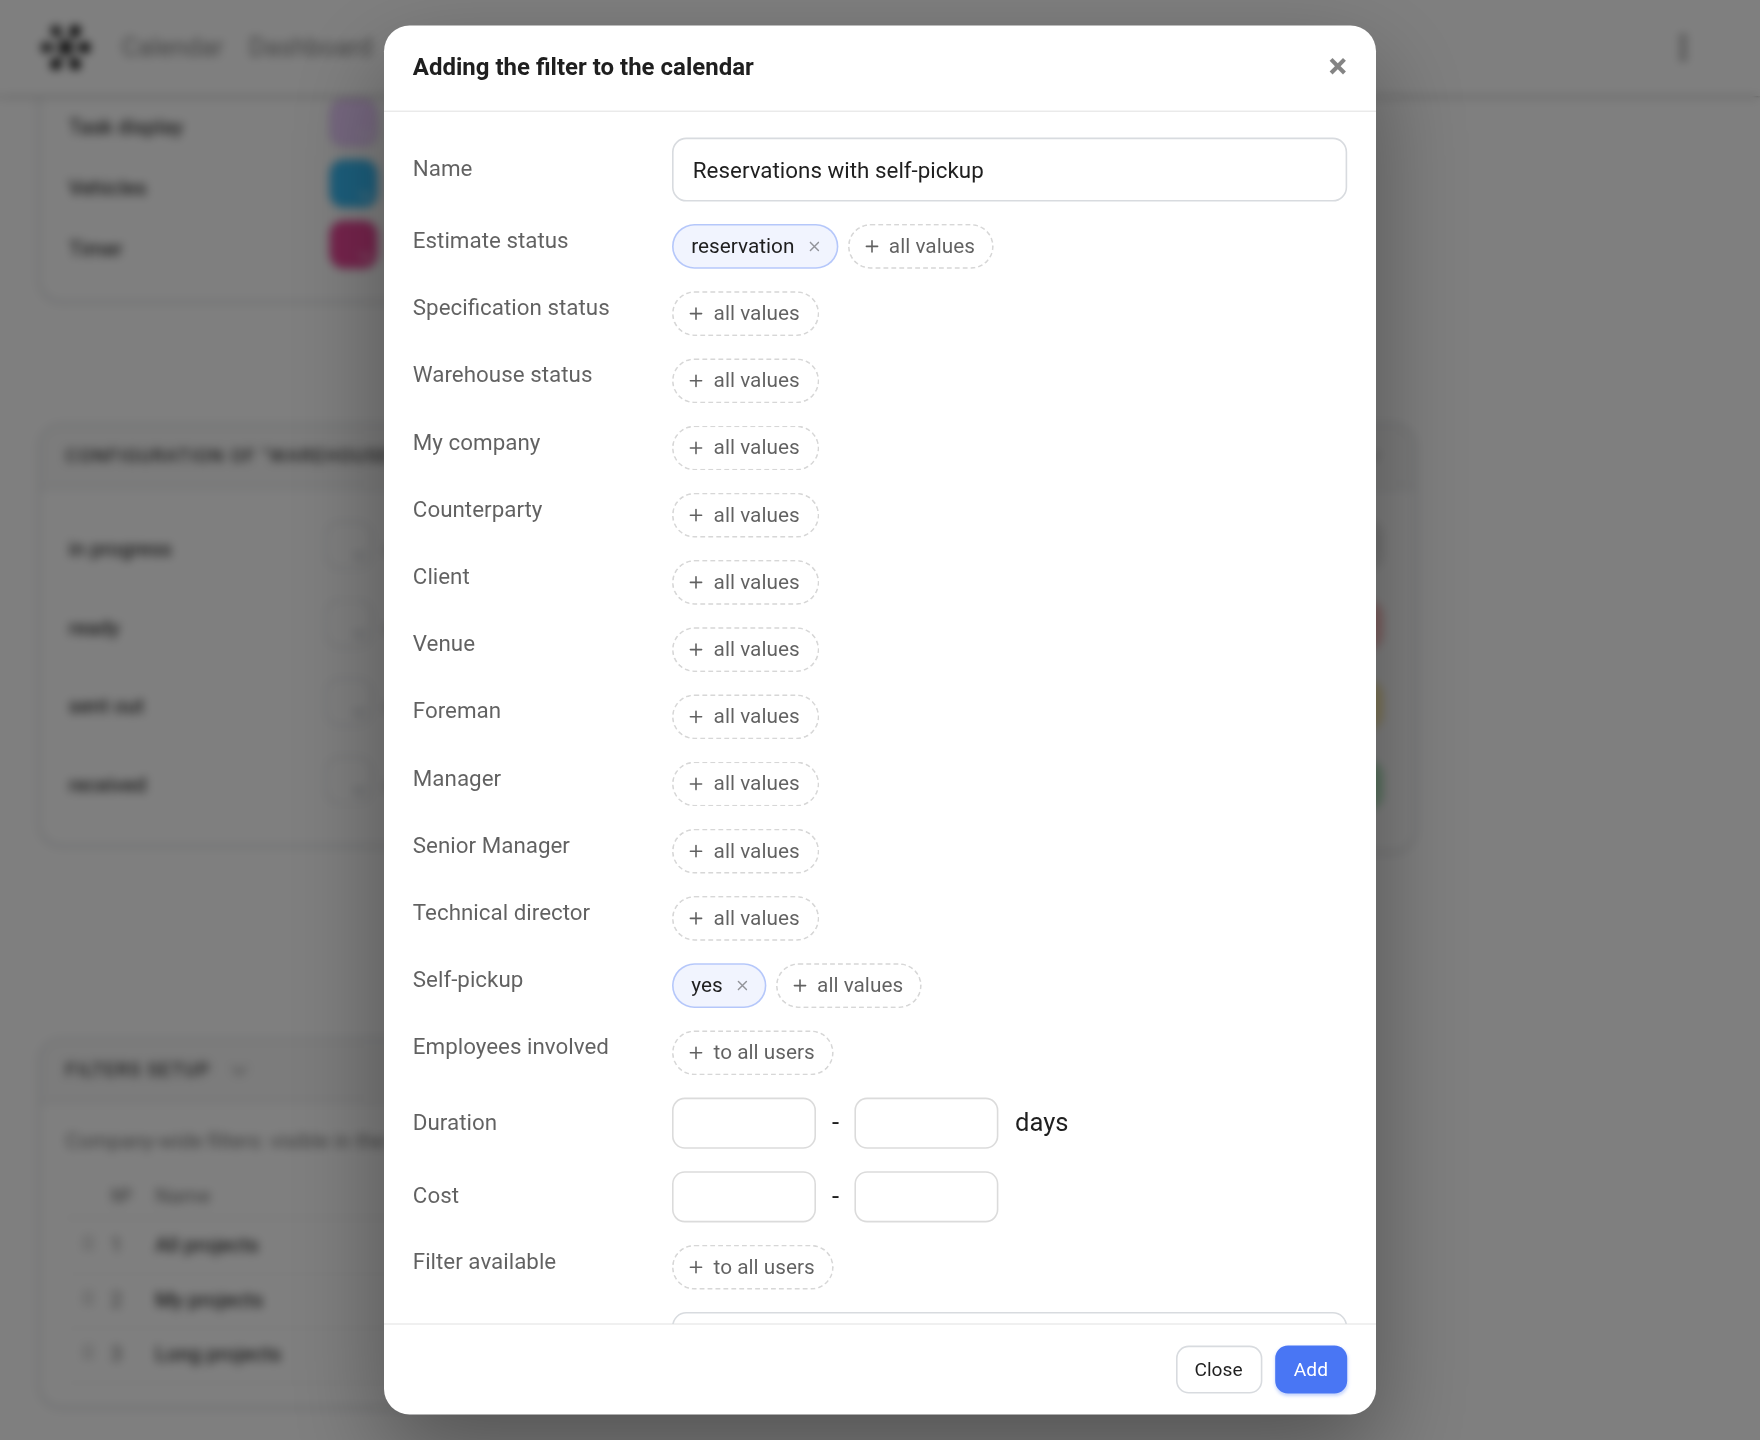
Click "+" in the card header. The "Adding the filter to the calendar" window opens. Set the name and the conditions, then click "Add". To correct a filter, click the edit icon in its row: the "Editing the calendar filter" window opens with the "Save" button.
Fields of the window:
Name: how the filter is called in the calendar. For example, "Reservation" or "My projects".
Estimate status: projects with the selected estimate statuses. You can select several statuses.
Specification status and Warehouse status: the same for the specification and the warehouse. These fields exist if the warehouse is included in your service plan.
My company, Counterparty, Client, Venue: projects where the selected companies, counterparties, clients or venues are set on the "Information" tab. Long lists have a search.
Roles: a row for each role from "Employees" → "Options" → "Roles", for example "Manager" or "Foreman". In a row, select employees: the filter shows projects where they are assigned to this role.
Self-pickup: "yes" keeps projects with "Self-pickup" turned on on the "Information" tab, "no" keeps projects where it is off.
Employees involved: projects where the selected employees work.
Duration: the project duration in days, "from" and "to".
Cost: the project amount, "from" and "to".
Filter available: which employees can see the filter. If you select nobody, the filter is available to all users.
Group ID: a number that defines how the filter is combined with others. See below.
If a field is empty, the filter does not narrow anything by it: the list shows "all values". The conditions inside one filter work together: a project needs to match every filled field. Inside one field, values widen the selection: if you select the statuses "reservation" and "confirmed", projects with either of them match.
Please note. In the "Duration" and "Cost" fields, the "from" value cannot be greater than the "to" value. Otherwise the window shows the error '"From" more than "to"' and does not save the filter.
Several filters at once: Group ID
In the calendar you can turn on several filters at the same time. How they combine depends on the "Group ID":
the same Group ID: the filters complement each other. The calendar keeps projects that match at least one of the filters turned on;
different Group IDs: the filters narrow each other. A project stays only if it matches the filters of each group.
Example. The filters "Reservation" and "Confirmed" have Group ID 1, the "Self-pickup" filter has Group ID 2. If you turn on all three, the calendar shows projects with the status "reservation" or "confirmed", and only those of them that are self-pickup.
By default the Group ID is 0. Personal filters that employees create in the calendar are always in group 0.
How the filters look in the calendar
Common filters appear in the filter row above the calendar and in the "Saved filters" window. An employee can turn them on, change their order for themselves or hide a filter with the eye icon. A common filter cannot be edited or deleted from the calendar: only here, in the settings.
If a common filter has conditions that the calendar filter window does not have, the calendar shows the mark "+ CRM settings" next to it. More: Filters and search.