Labels
In the "Labels" menu, you can create print templates to label equipment in the warehouse. Labels are printed for SKUs, the warehouse units of equipment. A label can carry a barcode, a QR code or simply information about the SKU (its number, name and model, row and bin in the warehouse, etc.).
The main "Labels" page stores all the templates you have created. To create a new label template, click "Add" at the top of the page.
On the page that opens, enter the template name, the parameters of the paper sheet the labels will be placed on, and the parameters of the label itself. Then click "Add".
"Width" and "Height" in the "Page Settings" and "Label parameters" blocks are required and need to be greater than zero. If you leave them empty or enter 0, the template is not saved, and a hint above the form shows which field to correct. The same rule applies when you edit a template.
To the right of the sheet and label parameters, you will see the "Preview" and "Elements" windows. "Preview" shows how the label will look, and in the "Elements" window you change it.
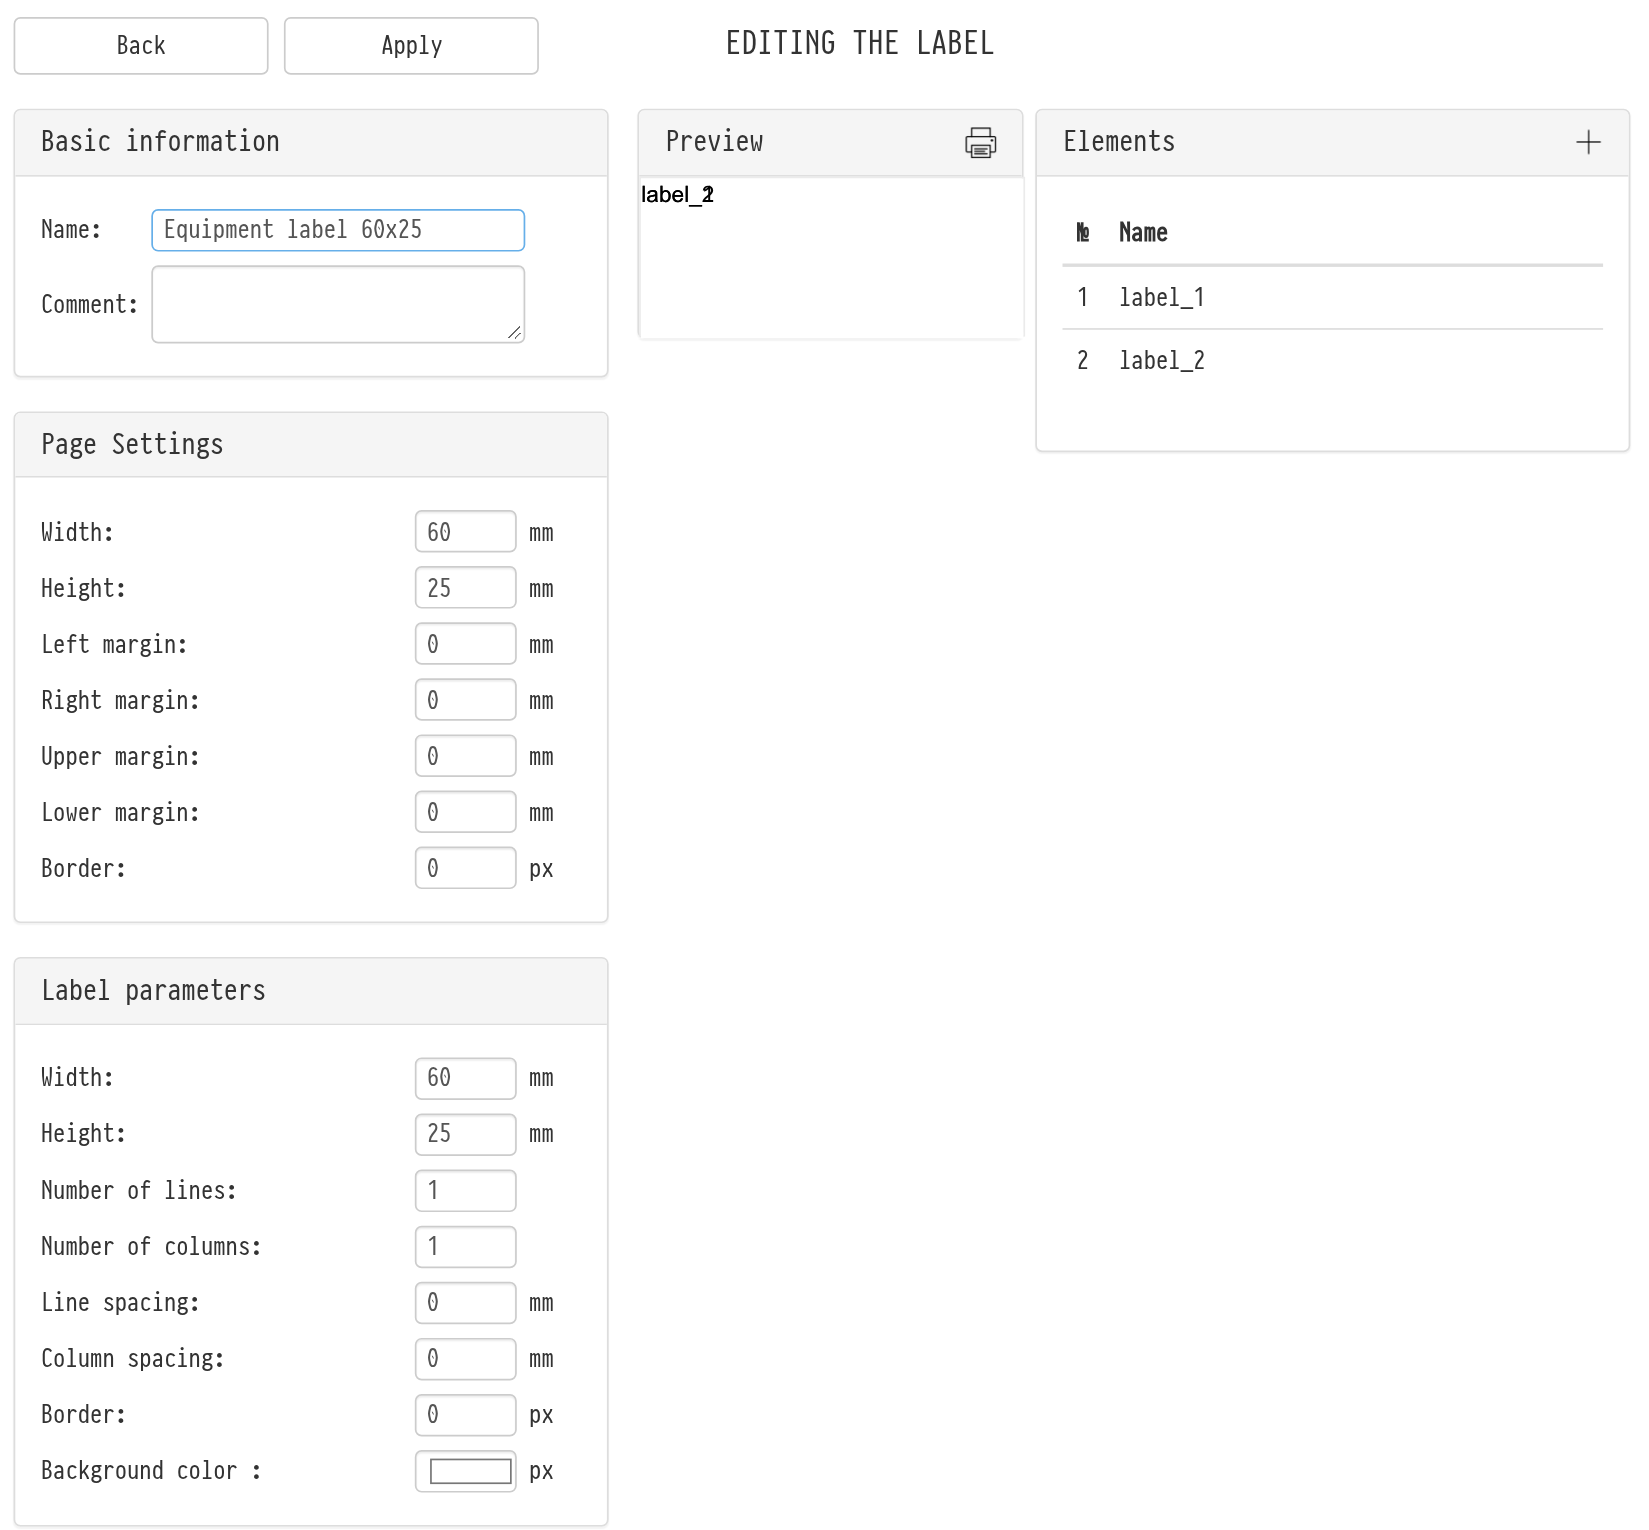
In the upper-right corner of the "Elements" block there is a "+" icon. Click it to add entries to the block: label_1, label_2, etc. Each entry is a separate piece of information that you can put on the label. Choose the type of the piece in the "Type" field:
constant: fixed text or a number set in the "Text" field (for example, your company name);
SKU: the SKU number. It can be shown as a graphic code (C128, QRCODE or PDF417) or simply as text (text);
SKU ID: the internal number of the SKU in the system, also as a code or text. You can scan such a label with a hand scanner straight into the catalog search;
serial number: the serial number of the SKU;
row: the row where this SKU is stored in the warehouse (the value is taken from the catalog);
place: the bin where the SKU is stored in the warehouse;
name: the name of the catalog entry the SKU belongs to;
model: the model name of the SKU, shown as text;
category: the catalog address of the entry this SKU belongs to;
manufacturer: the manufacturer of the entry;
internal comment: the text from the "Internal comment" field in the SKU card. Handy for notes like "for touring only" or "not for sublease". Line breaks are kept;
image: here you can upload a small image (for example, your company logo). We recommend images no larger than a few kilobytes.
Select an entry by clicking it, and a menu for editing its parameters opens on the right.
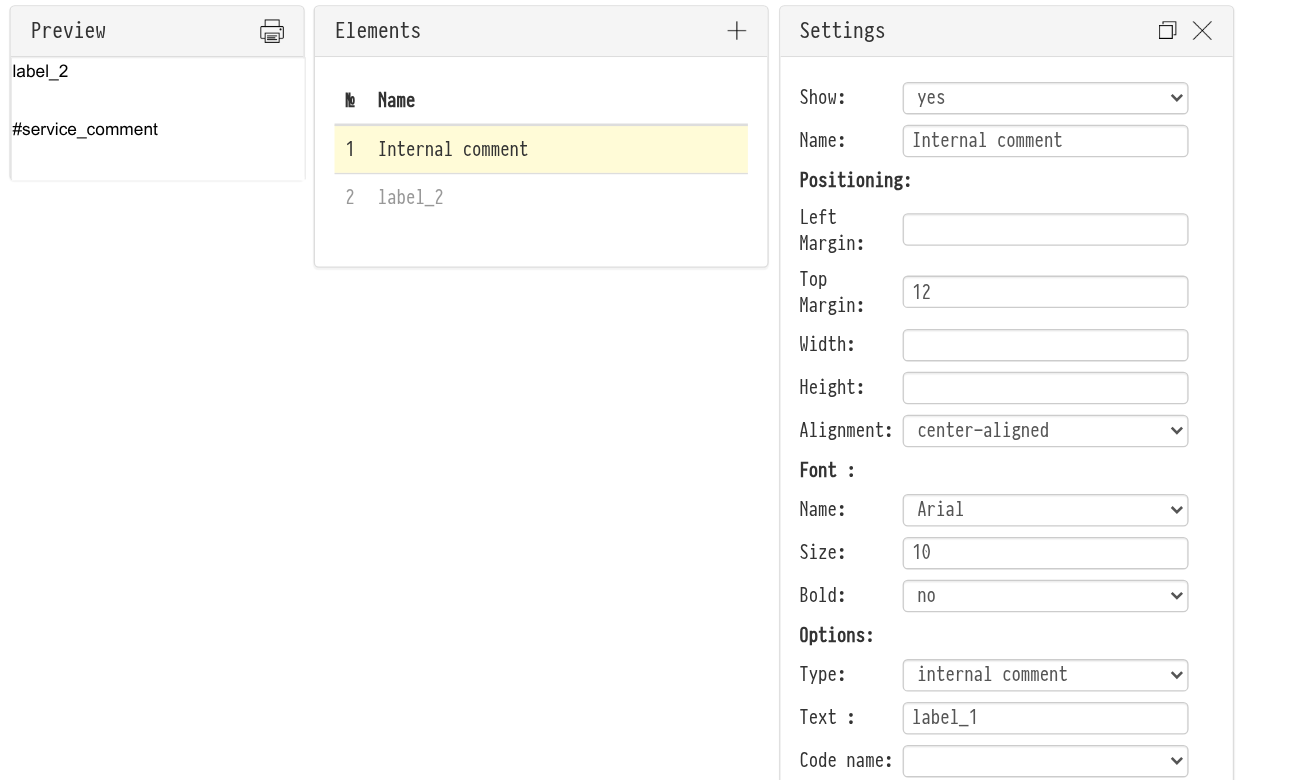
When you finish editing, click "Apply", and the label template is saved in the list on the "Labels" page.
To print labels, select the catalog entry you need so that the list of its SKUs opens in the workspace in the center of the screen. Select the SKUs you need (one, several or all) with the checkbox. A row of icons appears above the workspace. Click the printer icon. On the page that opens, choose the label template and the SKUs you need labels for, and download the generated file. The downloaded PDF has the parameters you set and is ready to be sent to print.
The element editing window has a "Font" block: "Name" (Arial, Courier New, Times New Roman), "Size", "Bold" and "Color". In "Label parameters" you set the "Background color" and the "Border".