Project from warehouse
Sometimes the client arrives at the warehouse before the manager has made an estimate, or the equipment is picked up "right now". For these cases there is the "Project from warehouse": the project is created ready for shipping, the warehouse staff scan what actually leaves, and the estimate is built from the scanned equipment.
How to create a project from the warehouse
In the calendar: click a free space on the day you need and select "Project from warehouse".
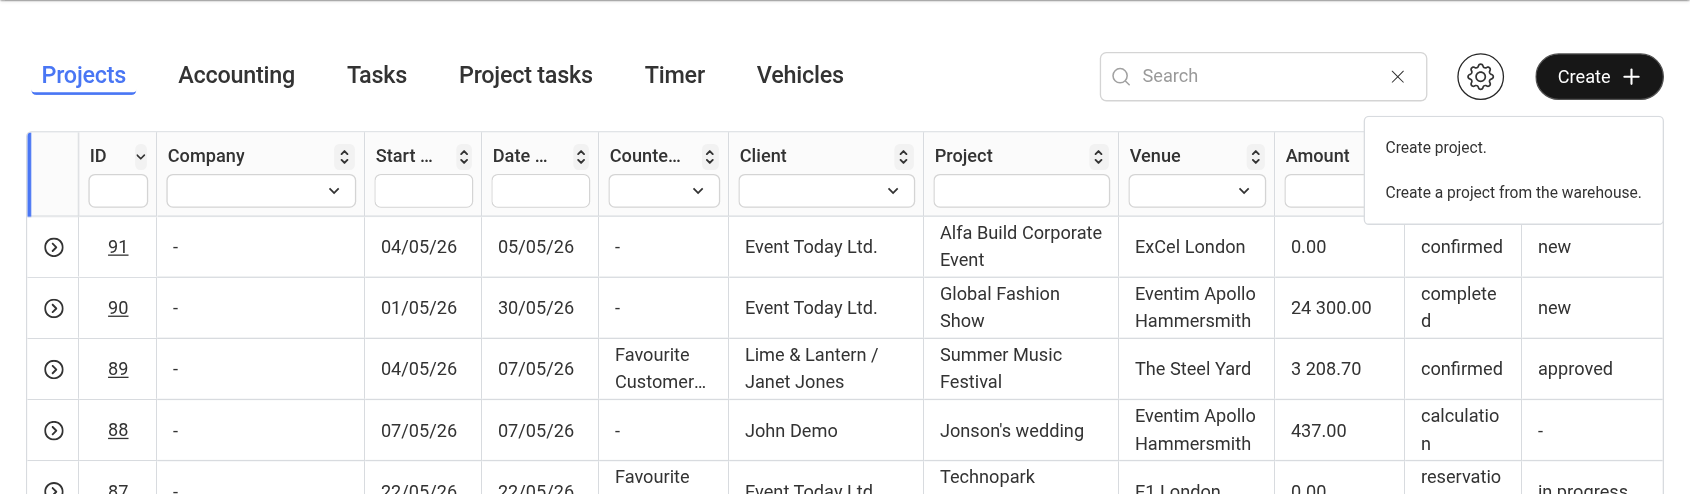
In the "Projects" table: click "Create" and select "Create a project from the warehouse".
The project is created for the date selected in the calendar (from the table, for today) and opens at once. Unlike a regular project, it does not get the starting statuses but the statuses the warehouse already works with:
estimate status: the first status with the "Specification" flag;
specification status: the status with the "Warehouse" flag.
So the "Warehouse" tab is available right away, and the project is visible to the warehouse staff in "Warehouse" → "Projects". How the status flags work is described in Estimate statuses and Specification statuses.
Please note. The "Project from warehouse" option is available only if the warehouse is included in your service plan and the employee's access template allows creating projects and working with the warehouse.
How to scan the equipment
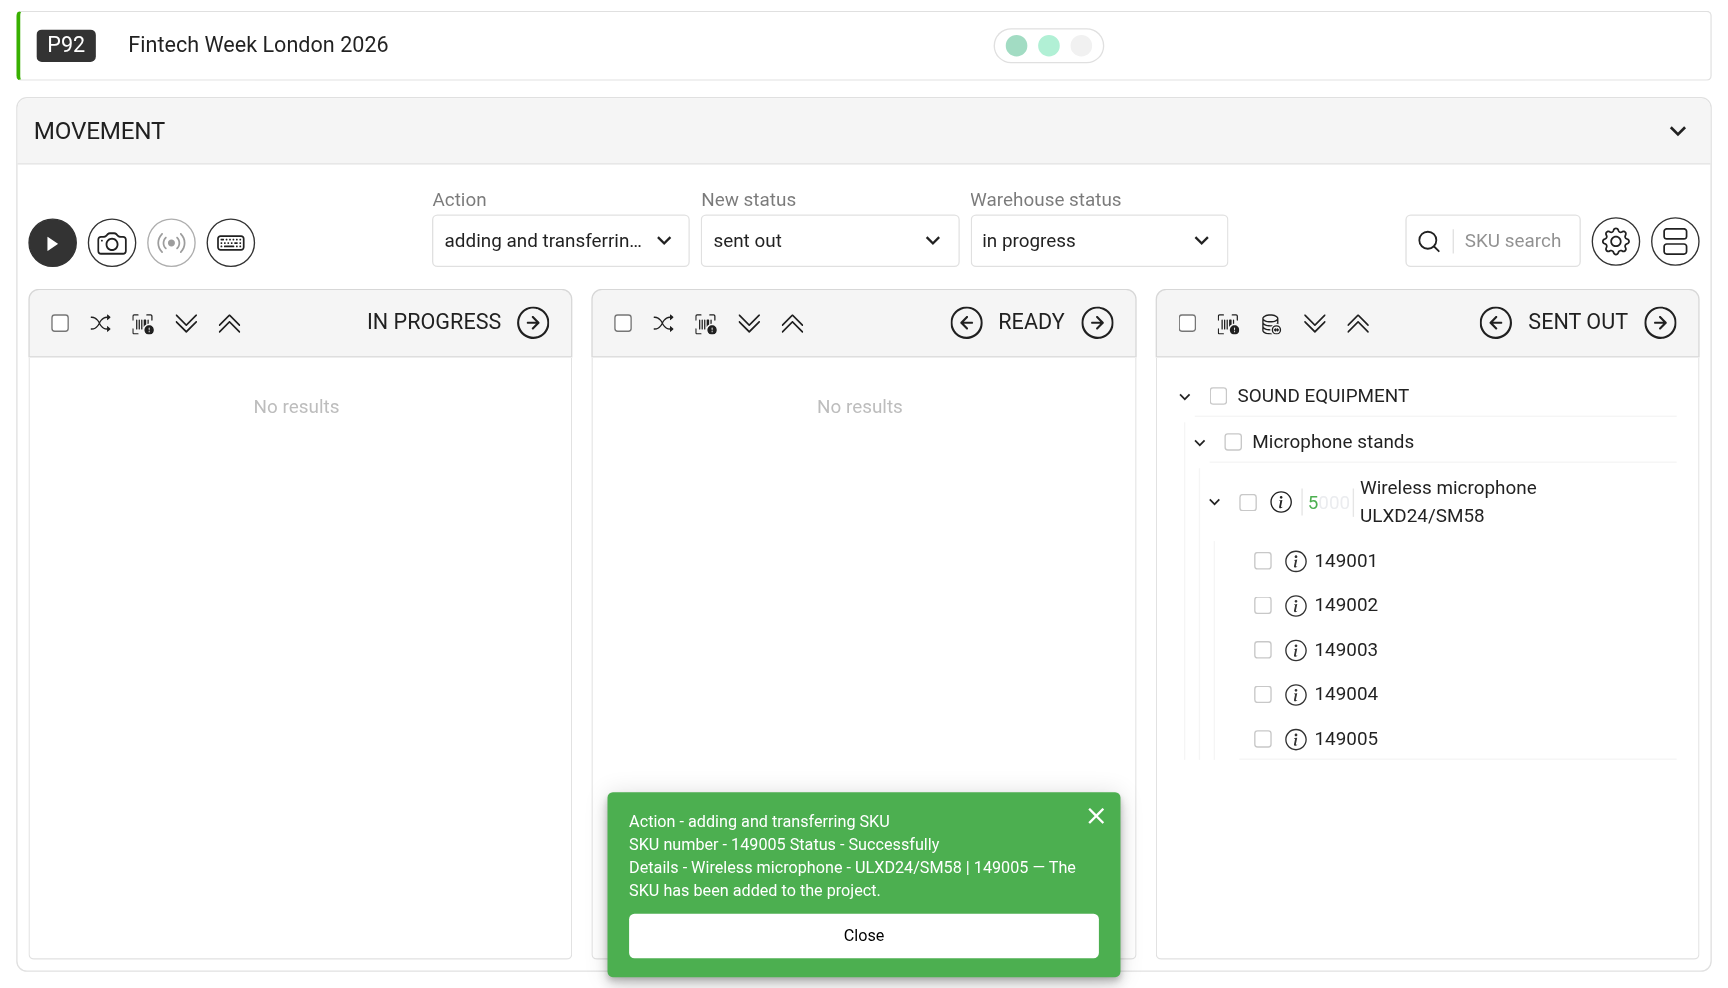
Open the "Warehouse" tab of the project and start shipping with the "▶" button on the panel of the "Movement" block.
In the "Action" field, select "adding and transferring SKU". The "Old status" field is hidden in this mode.
In the "New status" field, select where to move the equipment, for example the status for shipping to the venue.
Scan the equipment with a scanner, a camera or RFID, or enter the numbers manually.
Each SKU that is not yet in the project is added to the specification on the "Shipping" sheet and moves to the selected status at once. The system creates the "Shipping" sheet itself at the first such scan. If the SKU is already in the project, it simply moves to the new status.
More about scanning and other actions: Scanning barcodes and changing position statuses.
Please note. A SKU cannot be added if it is faulty, lost, under repair, already at a venue, part of a set or busy in another project: the system shows the reason in a message and in the scanner log. The mode also does not work when you receive equipment from the venue back to the warehouse: equipment that was not in the project can be received only with a mass return, see Mass return of equipment.
How to move the scanned equipment to the estimate
The scanned equipment goes only to the specification. To bill the client and create documents, move it to the estimate.
Open the "Specification" tab and find the "Shipping" sheet.
Click the three dots next to the sheet name and select "Copy to estimate".
Confirm the copying.
A sheet with the same name and the same entries appears in the estimate. Prices are taken from the catalog, taking into account the project's price type. Check them, set a discount or coefficient if needed, and create the quotation and documents as usual.
Please note. A sheet can be copied to the estimate only once. If you scan more equipment after that, the new entries do not reach the estimate by themselves: add them to the estimate manually.
More about the sheet menu: Actions with a specification sheet.