Equipment SKU
A SKU is the quantitative side of an entry, that is, a specific piece of equipment with its own unique identification number.
Example: the JBL SRX112 speaker is a catalog entry (Equipment). You can add it to an estimate, and it costs €90. It has dimensions and weight, which help with project planning. A SKU is a specific physical object. If you have four such speakers in the warehouse, you have four SKUs.
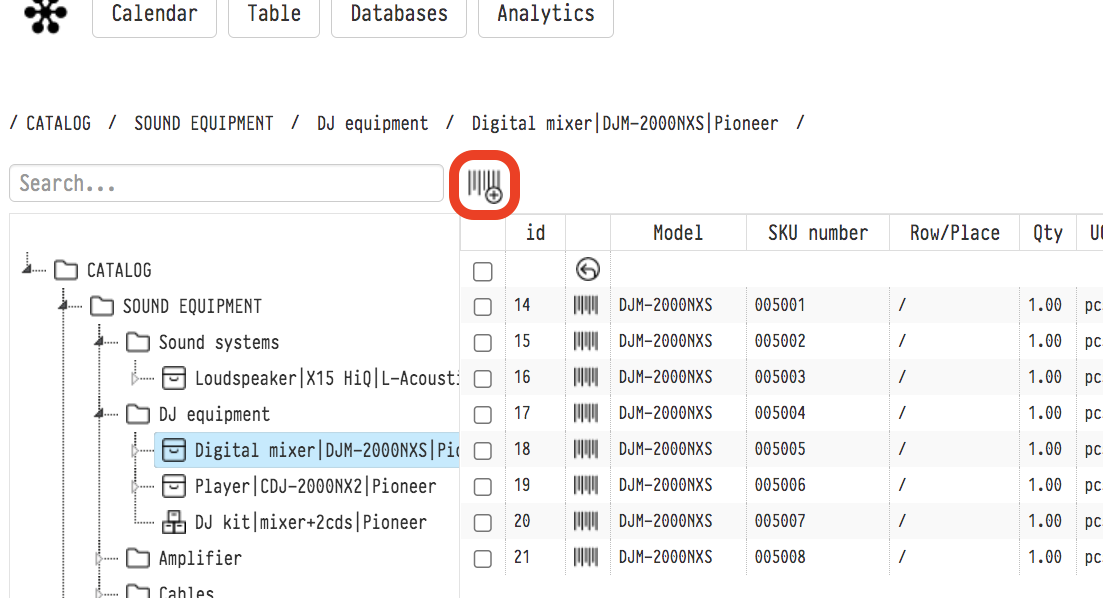
To create SKUs for Equipment, select the entry you need in the catalog tree or double-click it in the workspace in the center of the screen. Above the workspace there is the "Add quantity" icon: a barcode with a "+". Click it to open the window for adding SKUs.
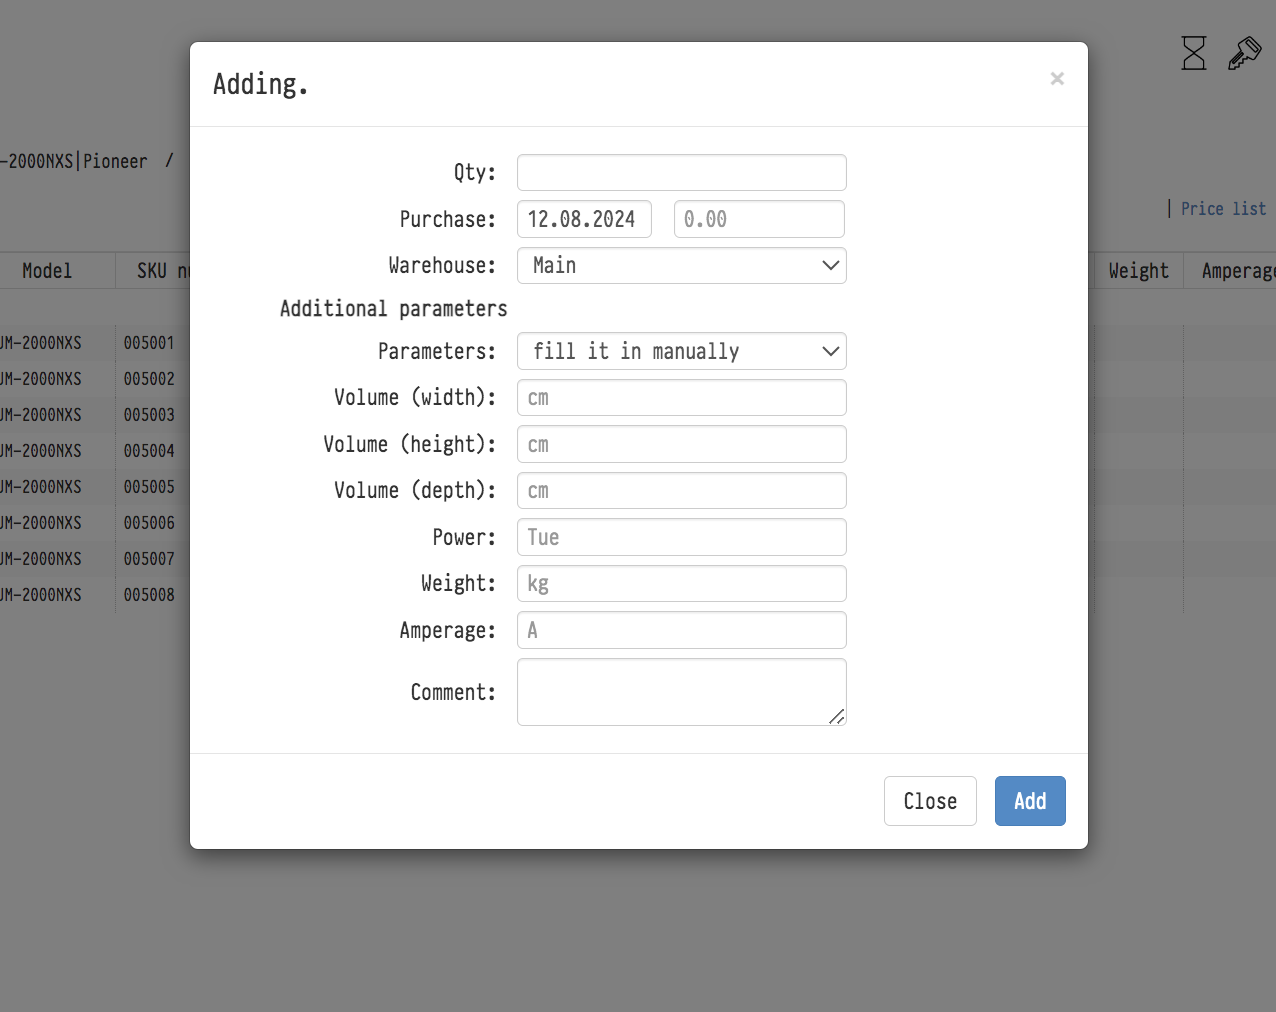
In the Qty field, enter the quantity you want to add.
In the Purchase field, you can enter the date and cost of purchase of this equipment.
From the Warehouse drop-down list, choose the warehouse where these SKUs will be stored.
In the "Additional parameters" block, in the "Parameters" field, choose where to take the dimensions, power, weight and current for the new SKUs from: "fill in manually": the values from the fields below are set for all SKUs you create; copy from the entry parameters: from the entry card; copy from the first SKU: from the very first SKU of this entry. You can correct the filled-in values before adding.
After you click Add in the window, the given number of SKUs appears in the catalog. Their numbers are generated by the system, but you can change them in the SKU card. The quantity of the entry you created the SKUs for also changes.
Equipment SKU card
To make the SKU card appear on the right side of the catalog, select the SKU you need in the central part of the workspace. The SKU card has three tabs: "Information", "Fields" and "Files".
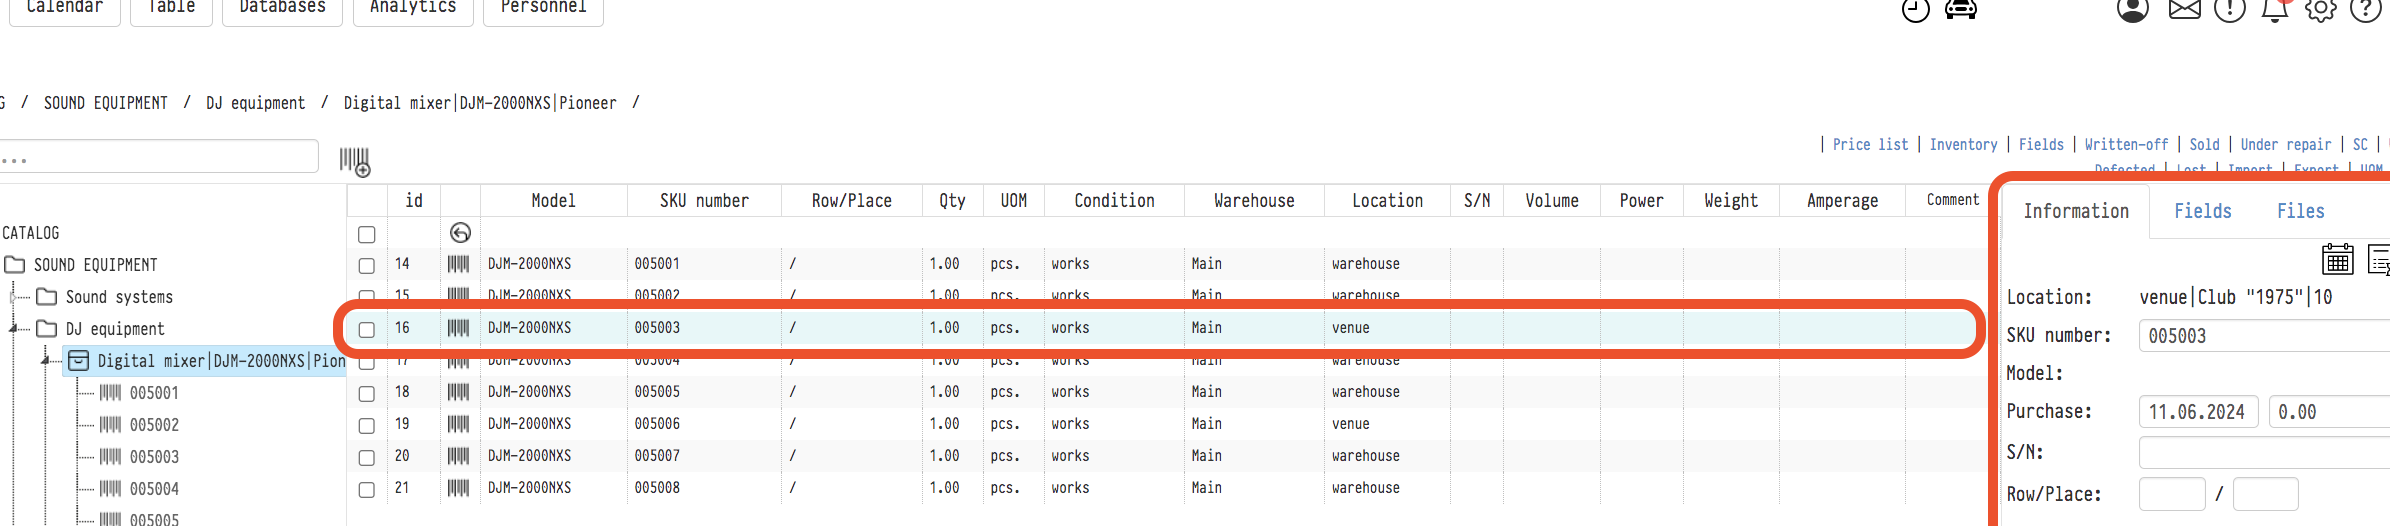
1) Information tab
In the upper-right corner of the Information tab there are three icons: Calendar, SKU history and the history of moving through projects.
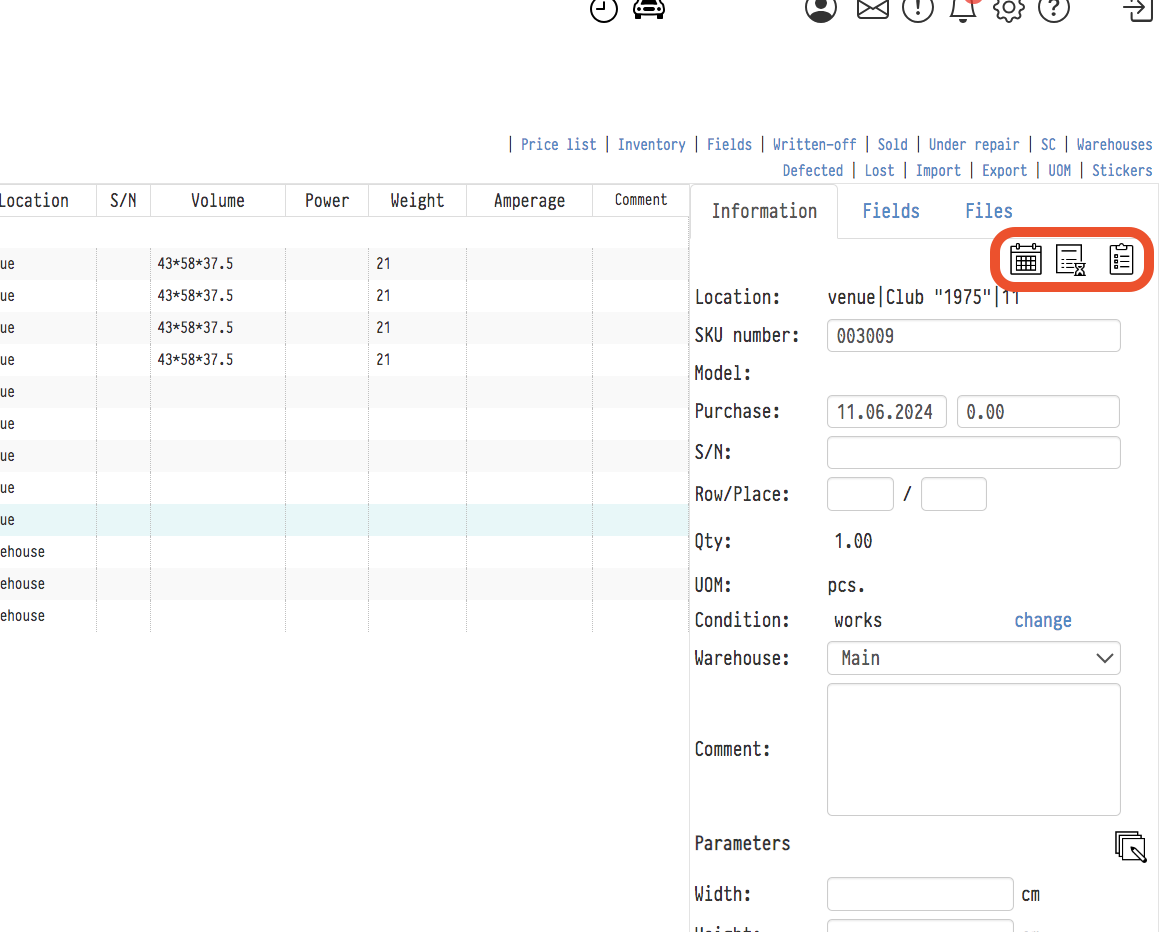
The Calendar shows the projects this SKU has been used in.
The SKU calendar opens in a new tab and is built from the specification, not the estimate: it includes every project where this SKU is assigned in the specification, for the booking time. An event shows the project number and name (if there is no name, the venue), the booking time and the project status. Click an event to open the project.
If the SKU is part of a set, the projects the set went to are also shown in the calendar of this SKU. Such events are highlighted in blue and labelled "Set:" with the SKU number of the set, so you can tell that the SKU worked as part of a set. Only the time while the SKU was fixed in the set is counted.
The SKU history shows all changes that happened to the SKU in the Catalog. The icon opens the "SKU log" page in a new tab: who changed what in this SKU and when. See System log.
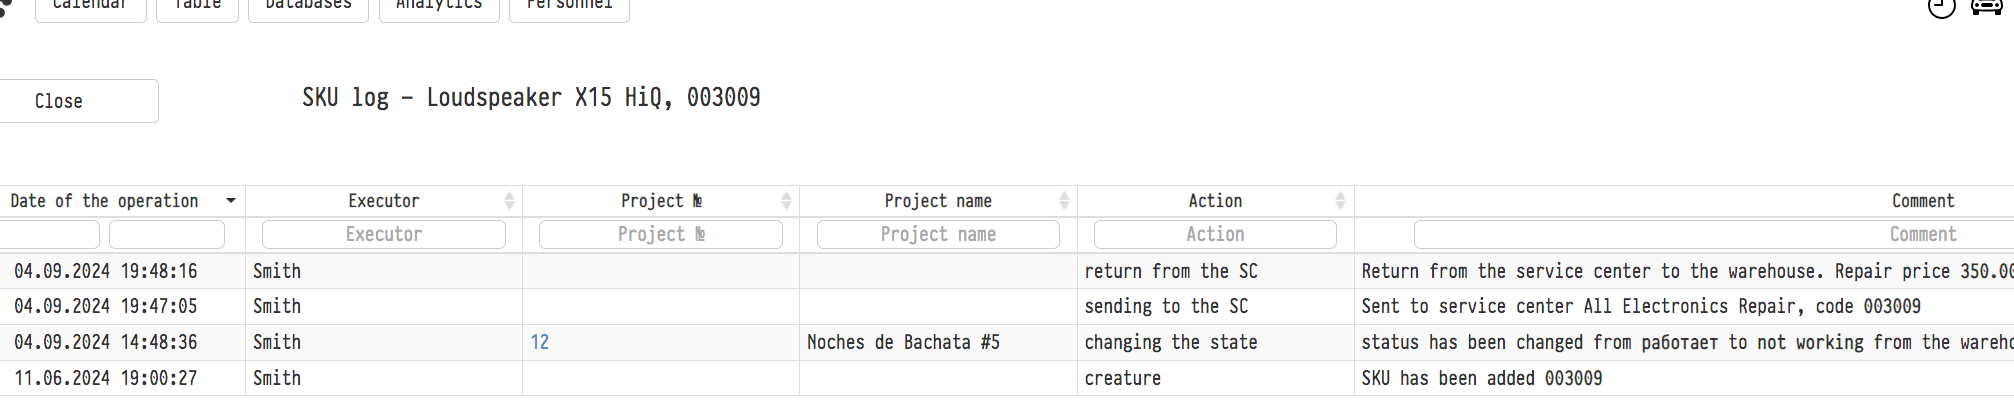
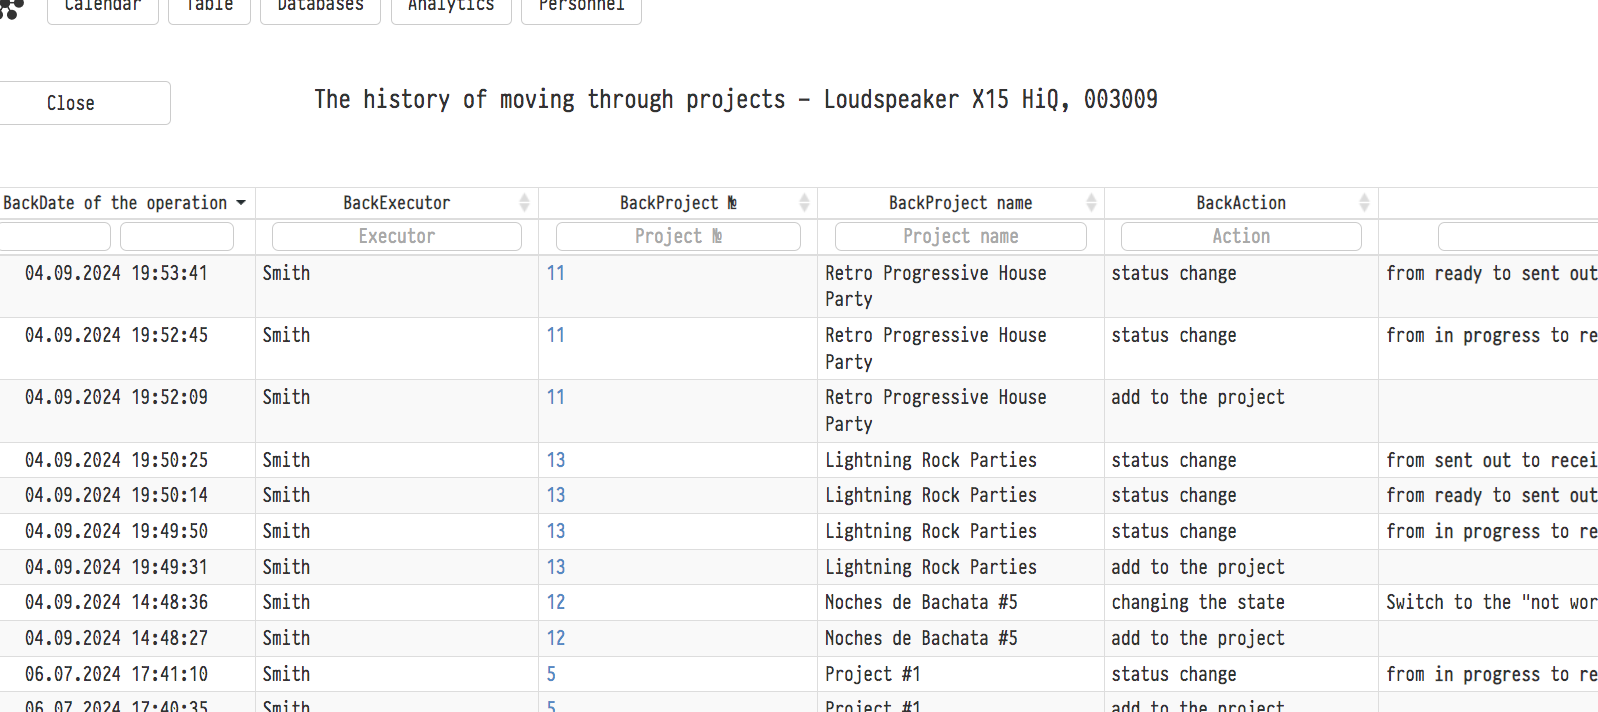
The history of moving through projects shows how the SKU moved between statuses inside projects (for example, from "ready" to "sent out" or to "received").
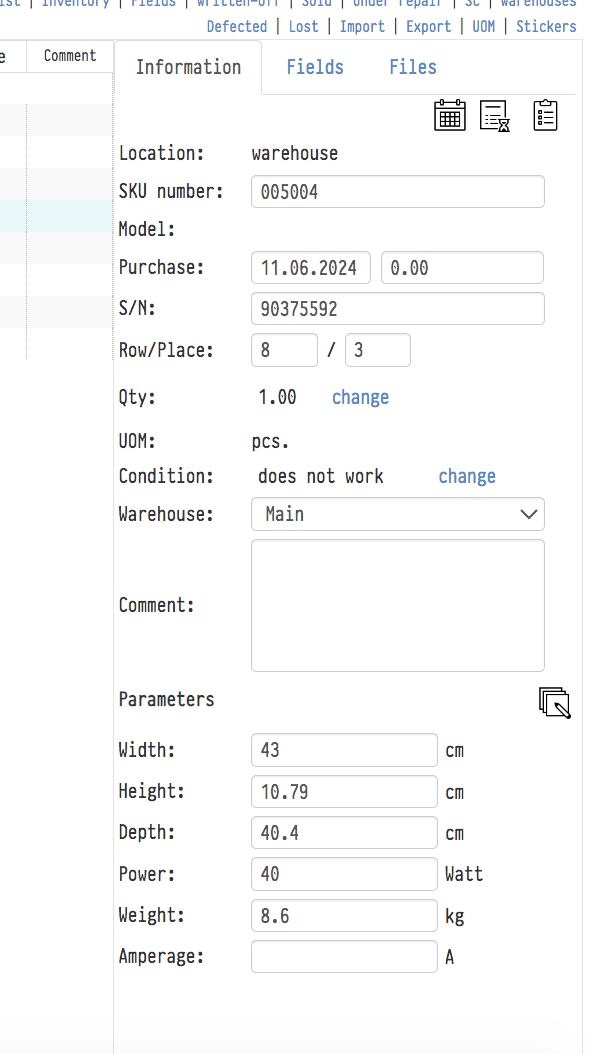
Current location. This field shows where the SKU is right now. Possible options: warehouse, service center (its name), venue (the venue and the project number are shown).
SKU number. Here you can set the SKU number manually. If the number is already used in the catalog, the system shows an error.
Purchase. Here you can set the date of purchase of this SKU and its cost. If you filled in these details when adding the SKU, they are shown here.
S/N: serial number. This is the manufacturer's serial number of the equipment, not the SKU number, which identifies the unit in the system.
Row/Bin. The warehouse coordinates of this SKU.
Qty. For the Equipment entry type, the quantity is always 1. Click "change" next to the quantity to write off, sell or send the SKU to a service center. When written off or sold, the SKU goes to the matching list (see the Top menu of the Catalog) and is removed from the balance: the total quantity of this entry decreases, and the SKU is no longer shown in the Catalog when you select the entry. When sent to a service center, the SKU goes to the "Under repair" list but stays on the balance.
Warehouse. Here you choose which of your warehouses the SKU is stored in. Warehouses are created in "Warehouses" in the Catalog top menu. Please note. These warehouses are for your internal navigation, to make equipment easier to find (for example, "Back room", "Second floor", etc.). They are not separate balances between which you can move stock.
Parameters. The physical parameters of the SKU. To the right of the heading there is the "apply parameters to all SKUs" icon. When you click it, the values set here overwrite the parameters of the other SKUs of this entry.
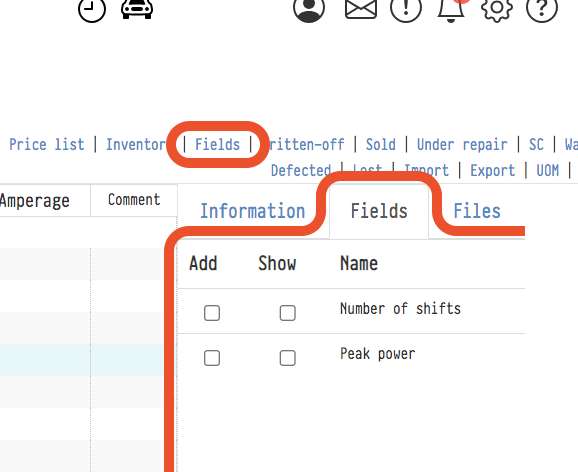
2) Fields tab
As in the Equipment card, you can add additional fields to the SKU card. They are created in Fields in the Catalog top menu.
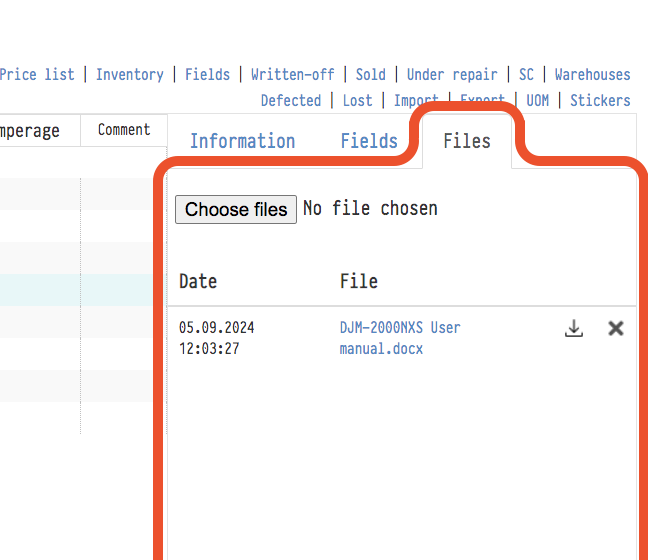
3) Files tab
To the right of the Fields tab is the Files tab, where you can upload any documents related to the equipment: a licence, insurance, photos, a user manual or any other information that is useful to keep next to the equipment.
4) The Monetary transactions tab stores information about the purchase of the SKU. A record is created automatically when the item is added, even if the price is not specified (in this case it is 0). The record includes the purchase date, quantity, cost and an optional comment. You can edit the cost and comment later if needed. For equipment, the quantity is always 1. This data is the basis of the Purchases report in the Analytics section.
The SKU card has the "RFID" and "Additional tags" fields: the numbers of the RFID tags attached to the SKU. How to assign tags: see RFID.
You can upload several photos to an equipment SKU: the "Photo" row on the "Information" tab. Browse the photos with the ← → arrows; the "download", "Share" and "delete" links under the photo work on the current one. A new photo is added with the file field under the slider, one at a time.
In the catalog, SKUs are highlighted by state: needing diagnostics in yellow, faulty in red, under repair in pink, lost in grey.