Sections and subsections of the catalog
Work in Golova starts with the catalog, and the catalog starts with its structure — the sections and subsections your equipment will live in.
The catalog has three logical levels: sections and subsections (folders) → catalog entries (equipment, services, accessories, consumables, kits, sets) → SKUs (the individual physical units behind an entry).
The structure you build here is not just for tidiness: sections define how equipment is grouped in the estimate tree, and therefore how it is presented to your clients in a quotation. It is worth thinking it through before you start adding entries.
Opening the catalog
In the main menu, choose Databases → Catalog.
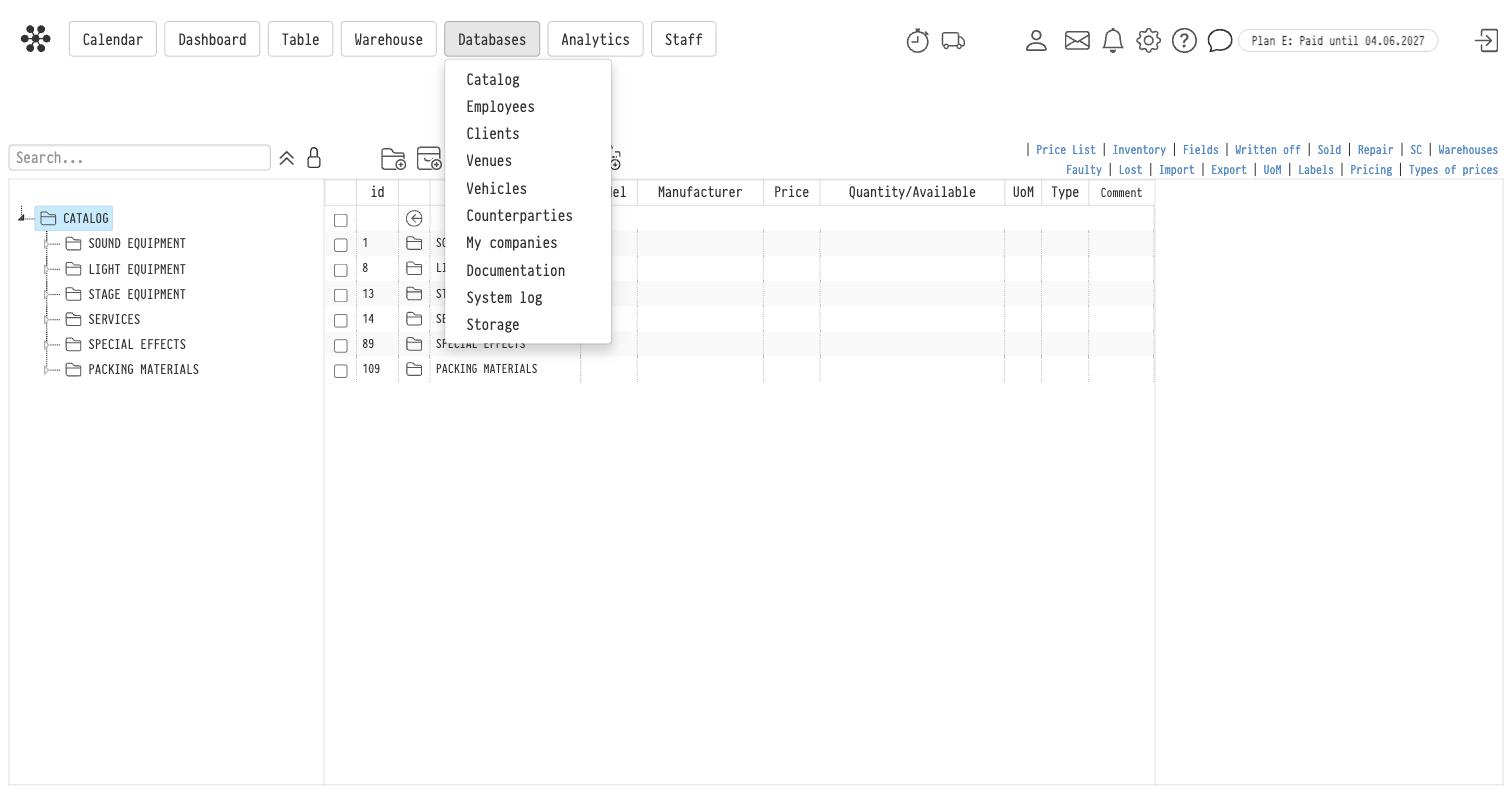
The catalog screen is divided into three parts:
left — the tree structure of your catalog, with a search field above it;
centre — the contents of the folder you are currently in;
right — the card of the selected section, entry or SKU.
Above the working area is a breadcrumb path (/ CATALOG / SOUND EQUIPMENT / …) showing where you are.
Creating a section
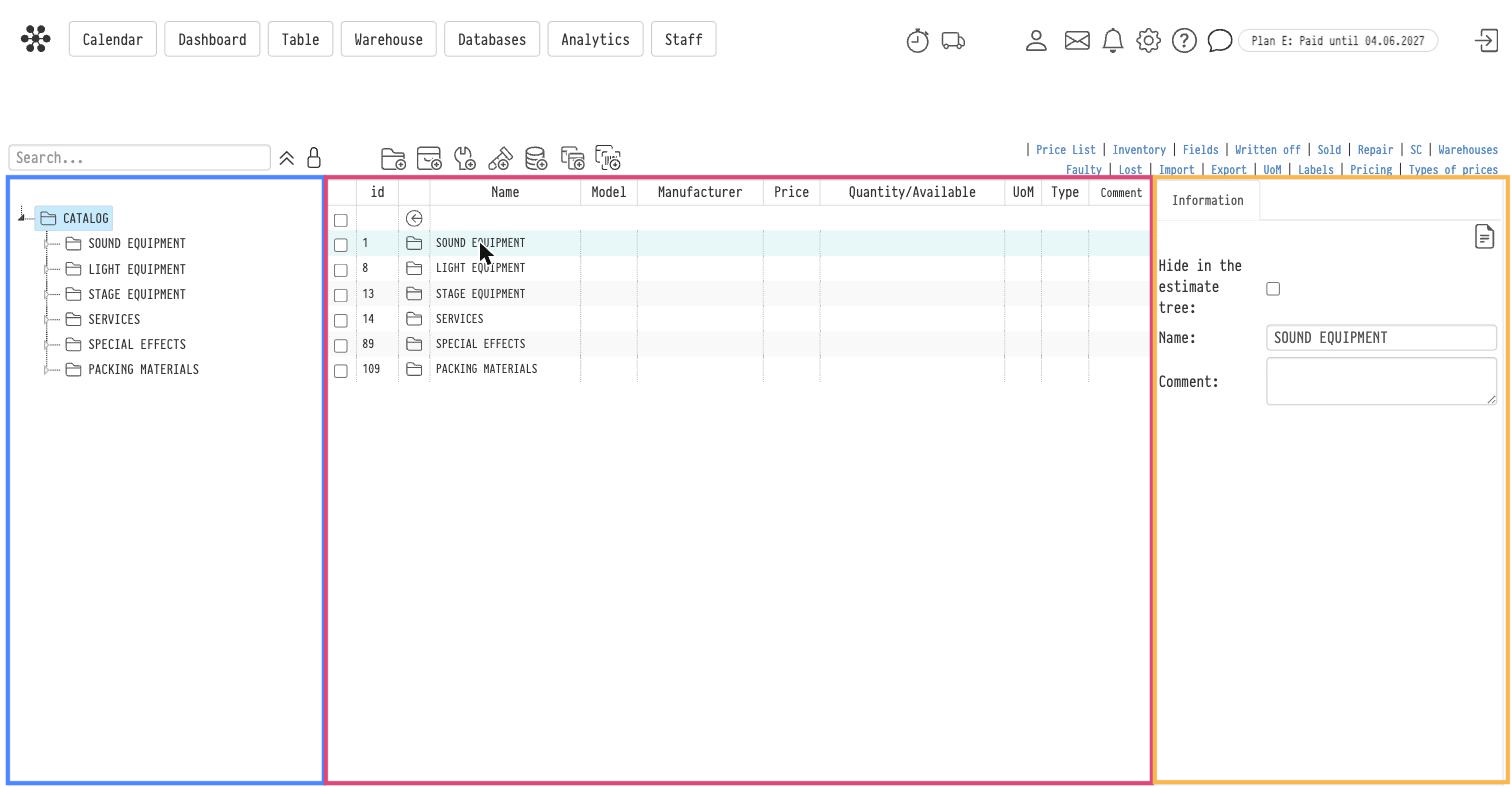
Seven + icons sit above the catalog table. Each creates its own kind of item, and the first one creates a folder:
Icon | Creates |
|---|---|
1 | Section (a folder) |
2 | |
3 | |
4 | |
5 | |
6 | |
7 |
Hover over any icon to see its name.
Select the folder you want to create the section in — in the tree on the left, or by opening it in the centre.
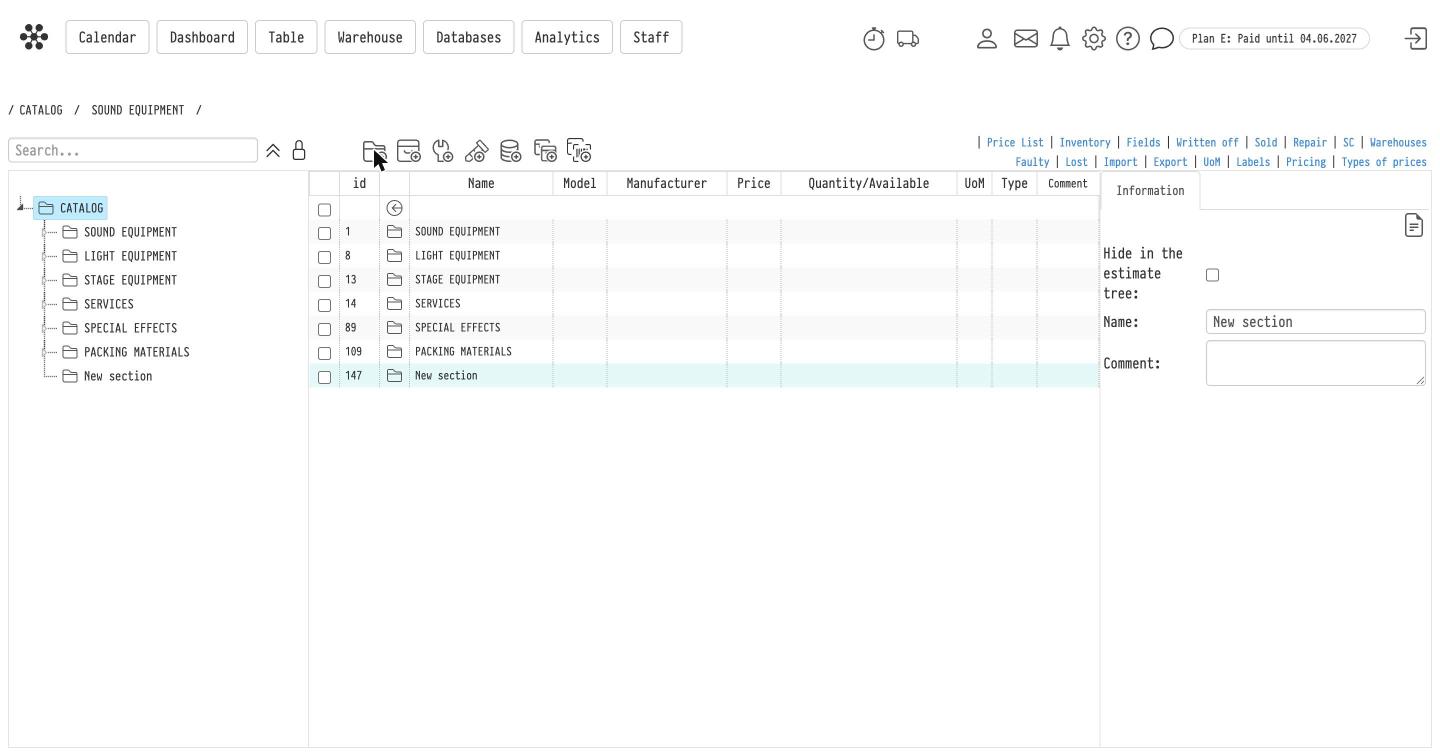
Click the Section icon. A row named New section appears at the bottom of the list, and its card opens on the right.
Enter the section name in the Name field of the card. Add a Comment if you need one — it is for internal use and is not shown to clients.
Creating a subsection
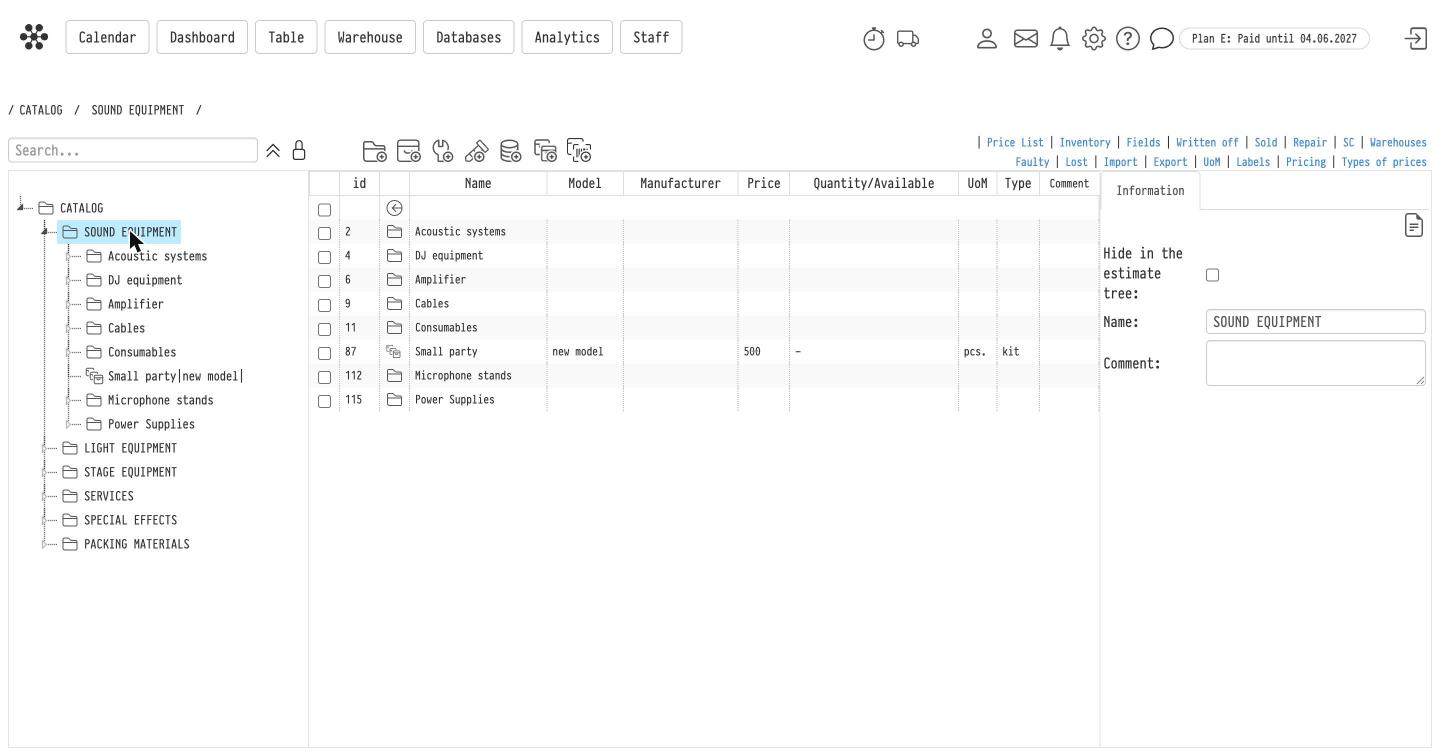
Open the section — double-click its row in the centre, or click it in the tree on the left — and click the Section icon again. The new folder is created inside the one you are in.
Nesting is not limited to two levels: you can create sections inside subsections as deep as your catalog needs.
To move back up a level, use the arrow in the first row of the table, the breadcrumb path, or the tree.
Section card
Selecting a section opens its card on the right:
Name — the section name.
Comment — an internal note.
Hide in the estimate tree — when ticked, the section is not offered when equipment is added to an estimate. Useful for service folders such as packing materials or internal spares, which you keep in the catalog but never sell.
The Folder history icon in the top right corner of the card opens the log of everything that has happened to this folder.
Hiding a section in the estimate
A catalog often has folders from which nothing is added to projects: an archive, equipment to be written off, internal consumables. So that they do not get in the way when you prepare an estimate, select the "Hide in the estimate tree" checkbox in the section card.
After that, the section with all its contents disappears from the catalog tree on the left of the project estimate. In the catalog itself the section and its entries stay as they were: you can edit them, and SKUs keep their bookings and history. Entries that are already in estimates also stay where they are.
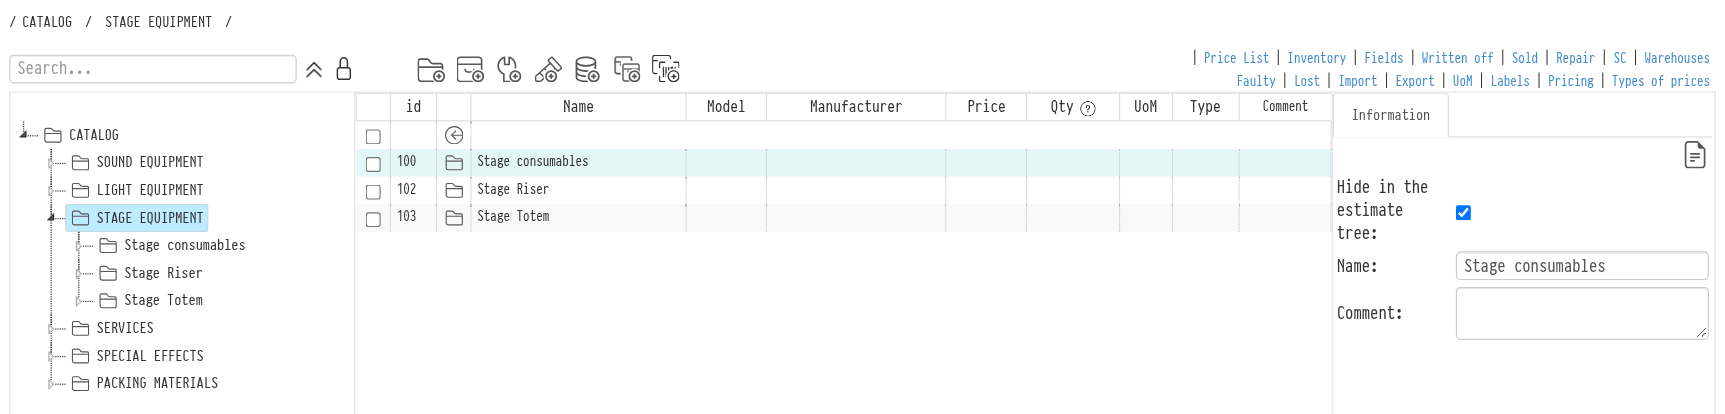
To return the section to the estimate tree, clear the checkbox.
The same checkbox is in the entry card: this way you can remove one entry from the estimate tree without hiding the whole section. See Equipment Card.
Please note. An employee with full access to the catalog in the access template can change the checkbox. With "read-only" access, the card shows "yes" if the section is hidden.
Reordering sections
By default the structure is locked so it cannot be rearranged by accident. Click the lock icon (Enable movement) to the left of the + icons, and you can drag sections and entries into a new order or into another folder. Click it again to lock the structure back.
The collapse all icon next to it folds the whole tree back to the top level — handy in a large catalog.
Copying, printing and deleting
Tick the checkbox next to one or more rows, and three more icons appear in the toolbar:
copy — duplicates the selected sections together with their contents;
Print — prints the selected rows;
delete — removes the selected sections.
Deleting a section deletes everything inside it. Move the entries somewhere else first if you want to keep them.
Where to go next
Catalog Navigation and Search — finding your way around a large catalog.
Catalog Entries — filling the sections with equipment, services and the rest.
Import and export — building the structure from a spreadsheet instead of by hand.
Fields — adding your own fields to catalog entries.